10 awesome yoga poses Conquer the pain of office workers
Even though young office workers can’t avoid sitting at a desk for long periods of time, we turn to these basic yoga poses. To relieve pain in the body,
sitting for a long time can cause many negative effects, including neck pain, shoulder pain, hip pain, and the risk of herniated disc disease. And it can have a negative effect on the digestive system, pancreas, and heart. However, young office workers can’t avoid sitting and working for long periods of time. Today, Kapook.com brings good yoga poses that you can follow. very difficult Let all office workers sitting at desks follow this to relax their bodies. stretching muscles and relieve various aches and pains.
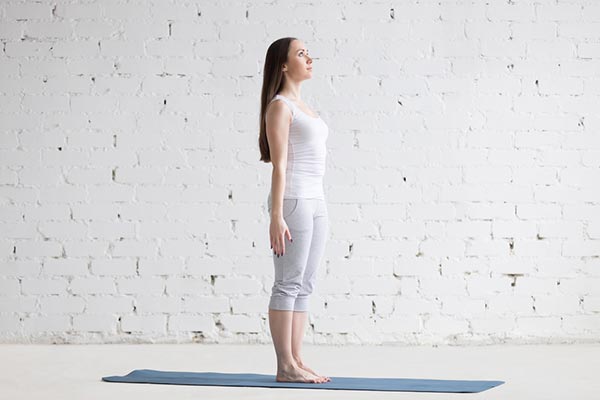
Stand straight with your feet near one another. With the heels and shoulder position similarly situated
– Stretch the knees tight. Fix your thigh muscles and fix your knees.
– Fix your muscular strength. Stretch your chest, back, and neck straight and gaze directly ahead.
– Keep up with body balance by allowing the load to pass directly from your head. Down to the shoulders, then to the focal point of the hips, to the knee joints, lower legs, and bottoms of the two feet
– Place your arms near your body. or on the other hand hands fastened over the head Or you can hold your hands on your chest
2. Cobra pose.

The next pose we would like to recommend is the Cobra pose. Because in addition to helping create flexibility for the spine and our abdominal muscles It also helps the digestive and excretory systems work better. It’s suitable to do in the morning before starting your day. This will help you feel more open, relaxed, and comfortable.
How to practice
– Lie on your stomach with both legs close together. Place your hands so that the tips of the index fingers touch each other and the thumbs collide like a triangle. Place your forehead in this area
– move slowly one section at a time. From setting the chin, opening the chin, opening the chest, then arching the back until the elbows are straight. While breathing in
– lower your back one section at a time. Place forehead on the floor, exhale, practice 3-5 times.
3. Sphinx pose
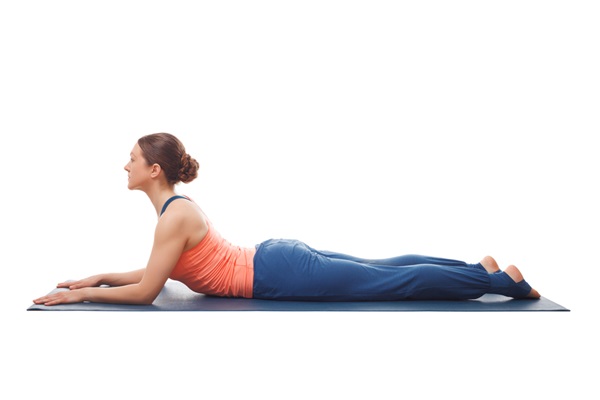
Although the Sphinx pose may not be very familiar to you, But it’s not difficult to follow. And it’s good for young people who have to sit and work for a long time because the Sphinx pose helps stretch the spine, chest muscles, and open the shoulders. It also helps to calm our minds.
How to practice
Lie on your stomach with your stomach close to the floor. Stretch your legs together
. – Place your palms forward, lined up with your body.
– Twist your elbows. Lift your body around the shoulders, chest, and neck, with your hands actually overcoming.
– Hold for around 5-10 breaths, then, at that point, return to the beginning position. plant And begin again however much you are fulfilled.
4. Cat and Cow Pose (Cat and Cow Pose)
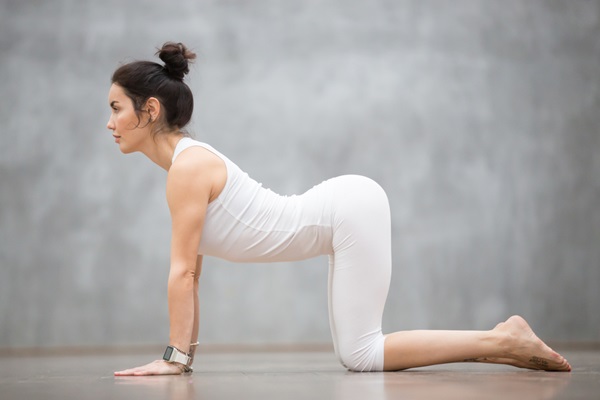
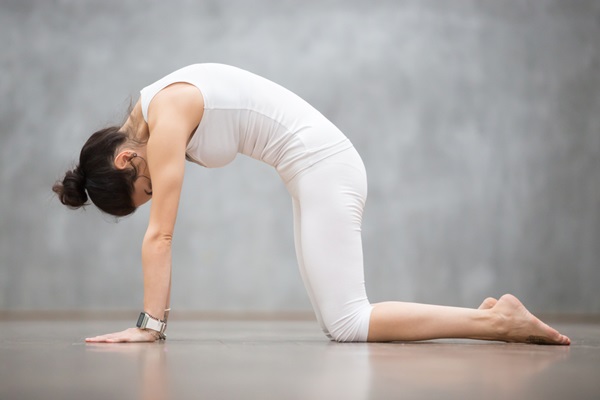
Another easy pose to do is cat pose and cow pose. Anyone who has never done yoga We recommend starting with simple poses like these because even though they are easy to do, But it has many good benefits for the body. Both help reduce shoulder and neck stiffness. Increase flexibility in the spine Helps us breathe more deeply. It also stimulates the abdominal organs to work better.
How to practice
– Bow and put your hands on the floor. The hand should be in accordance with the shoulder. The knee ought to be in accordance with the abdomen
. – Attempt to appraise the distance between your knees and hands to be the very same length as your body.
– Breathe in and gradually lift your head to look upwards. Also, curve your rear end higher than your back.
– Breathe out while keeping your jaw away from plain view. Curve your back in the way of a growling feline
– stand firm on the footing briefly. Then, at that point, return and rehash for around 10-15 sets.
5. Child’s Pose
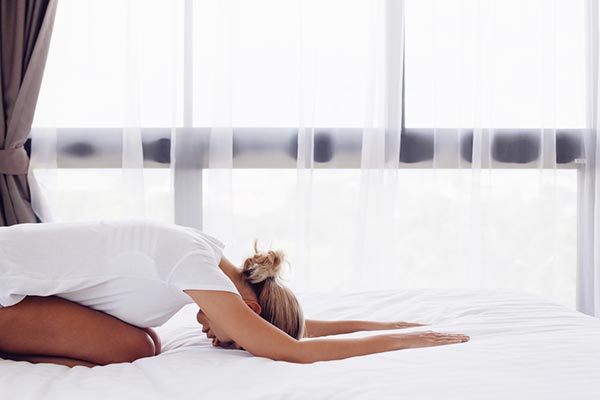
The child crouching pose is also not difficult to follow. But it helps stretch the muscles in the lower back, waist, neck, ankles and helps open the hips very well. And if anyone wants to know more about the cool benefits of the child squat pose. You can check it out here
How to practice
Sit kneeling down with your feet near one another. Stretch your toes and lower legs back. By sitting behind you
– breathe out and twist down. Then, at that point, he put his temple on the floor. The neck is straight and not shifted aside. backside on heels However in the event that you can’t twist around, lift your butt marginally.
– Stretch the two arms over your head however much as could be expected. Then press your palms down against the floor. Or on the other hand make a free clench hand and turn your hand upwards. Stretch the two arms towards the toes however much as could reasonably be expected. Hold the posture for 30 seconds and afterward discharge the posture.
6. Corpse Pose
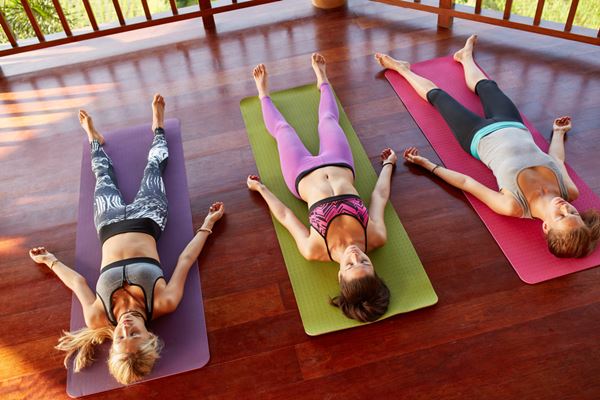
If you’re stressed out from work, when you get home try doing Corpse Asana. It helps you feel relaxed. Because the highlight of this pose is that it helps to calm the mind. Relieve symptoms of tension Reduce headaches and helps solve the problem of insomnia But most importantly, don’t forget to practice breathing correctly.
How to practice
Sit with your knees raised on the floor. Utilize two hands to help the ground behind you. Then lift the hips and move them towards the back, then, at that point, gradually loosen up the right leg followed by the left leg.
– Utilize your hands to help the neck, then, at that point, gradually lie on your back on the floor. You can track down a little pad to help your head. In any case, you need to keep your head adjusted. The two ears should be equidistant from the shoulders.
– Lift your arms opposite to the floor. Then let your arms drop to your sides, palms looking out, arms and legs directly at your sides. With your hands somewhat separated from your hips
– Shut your eyes and control your taking in and out as per the standards of breath preparing.
– Tense the muscles in each piece of your body. Beginning with your toes, hold for 5-6 seconds and delivery. Then, at that point, go up and tense the muscles in your legs, knees, thighs, hips, mid-region, chest, arms, hands, fingers, shoulders, neck, face, and mind in a specific order, 5-6 seconds every, then discharge – then
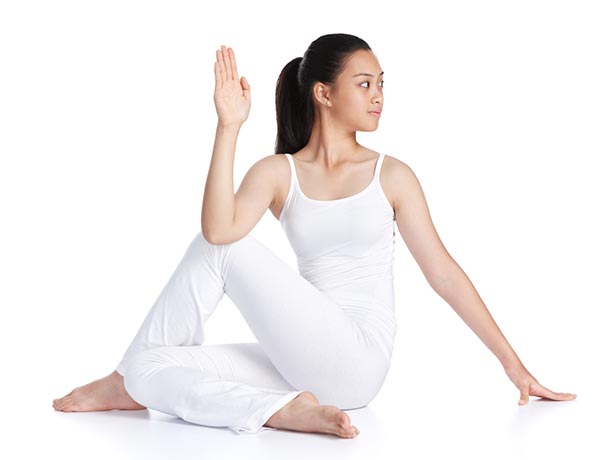
7. Seated Spinal Twist:
The outstanding benefit of the seated spinal twist is that it helps relax the muscles in the lower back from being too tight from sitting for a long time, and most importantly, it helps prevent hunchback symptoms from sitting in the wrong position and bones. Can collapse too Because this position will help the spine twist. Relaxes the nervous system of the spine. Reduce injuries to the waist, hips, back, and help treat connective tissue injuries.
How to practice
Sit with your left foot outstretched, establishing the underside of your foot, right
foot set straddling the left knee, back straight. – Breathe in, lift left arm above head.
– Breathe out, left arm crossed with right knee. Then go around and get the external bottoms of your feet. (In the event that you can’t arrive at it, utilize your passed available to embrace your right knee hidden from plain view)
– Breathe in, lift your right arm before you.
– Breathe out, wind your body to one side. Place your right hand behind your back, wind your midriff intensely, back straight, eyes investigating your shoulder. Care is to take in profoundly, breathe out lengthy, unwind, stand firm on the foothold briefly
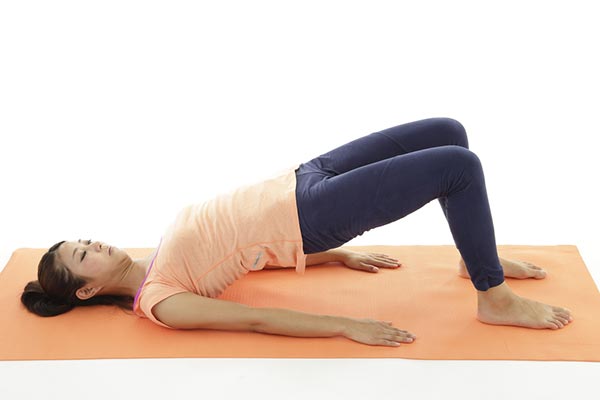
8. Bridge lifts: Bridge lifts
are especially suitable for people who sit for long periods of time, such as office workers. It is a pose that helps stretch almost every muscle in our body. including chest muscles, neck muscles, and spinal muscles The muscles in the hips and buttocks are also good for the abdominal organs and digestive system.
How to practice
Lie on your back with the two knees raised.
– Two hands on the sides of the body
. – Lift your body with the goal that your butt is off the floor. Hold the posture for a count of 1-10, then, at that point, return to the first position
. 9. Low lunge
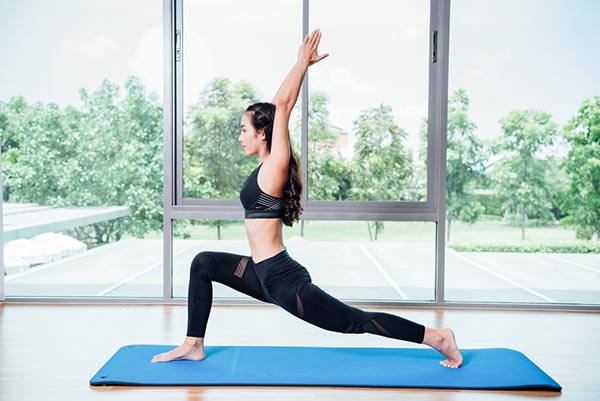
Sitting for long periods of time can cause many women’s buttocks to become unintentionally larger. But don’t worry. Because just by doing this It will help the girls’ buttocks become more toned. Plus, the low lunge yoga pose can also help stretch the muscles in the shoulders, back, and hips.
How to practice
Begin from a creeping position. Place your feet somewhat separated and your hands on the two sides. Lift your hips with the goal that your legs and arms are extended tight. Step your right leg forward. The left leg is extended behind the back. Knees on the floor
– Breathe in, twist down, stretch one leg completely behind you. Until the other foot is opposite to the floor, two hands are put on the floor. Or on the other hand utilize your fingertips to contact the floor
. – Draw your arms from the side up over your head while breathing out. Gaze toward your hands.
. 10. Warrior pose (Warrior)
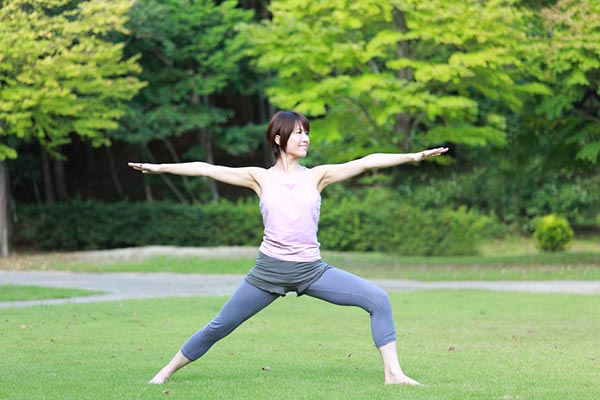
The highlight of warrior pose yoga is that it helps stretch the tendons in the back of the shoulders, abdomen, and the sides of the body. until it reaches our ankles Therefore, whether young office workers have back pain, shoulder pain, neck pain, waist pain, knee pain, calf pain, or ankle pain. Do this pose in one move and you’re done!
How to practice
Stand straight, toes near one another, body straight, breathe in delicately and gradually.
– Stage one leg back very wide. with the two arms raised over the head Attempt to keep your arms near your ears to keep them straight. The chest will lift and you will feel endlessly tense in the chest region.
– Twist your right knee and turn your abandoned foot you to marginally shift forward alongside your right foot. (Will be sideways to the front around 45 degrees)
– Move weight to the front of the body. However, the chest area stays upstanding. Breathe out leisurely and long
– the right leg ought to just be twisted at a right or inhumane point. Whenever done accurately, you will feel a snugness in your right thigh. Keep the legs tight
– The abandoned leg should be straight. The left heel ought to be immovably established on the ground and not lifted.
– While getting back to the beginning position, fix the right knee. Draw the two arms down the sides of your body. Lift the left foot back to its unique position