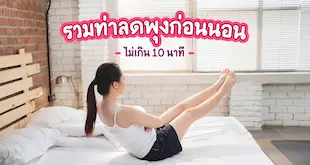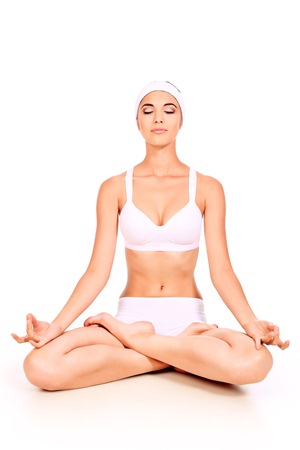
How to practice
– Sit cross-legged on the floor. Place both palms on your knees. Set your breathing in and out deeply. and related Breathe in and out deeply at least 5 times
. – Raise your arms above your head while inhaling. Gently place your arms down slowly while releasing the breath.
– Repeat the same position 5-7 times
. Benefits
– Stimulates the functioning of Liver, kidneys and intestines
– strengthens immunity
– stimulates blood circulation in the stomach Treat and relieve hip, back, waist, and menstrual pain. and makes menstruation normal
– stimulates the metabolism
– people with a curved or S-shaped spine will help a lot. Hold for a long time, giving the spine and muscles time to stretch and relax.
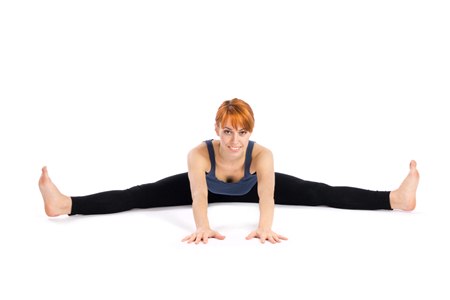
Sit with your legs straight. What’s more, spread your legs as far separated as could be expected
– gradually twist down as though collapsing your body onto the floor. Do however much you can. Try not to compel your body by any means.
– While holding the posture, center around your relaxing.
– Relax the posture and notice the solace that emerges.
Benefits
– Permits the leg muscles to be completely practiced in endlessly extending. Ordinarily, this muscle contracts from being required to help our whole weight.
– Changes the equilibrium of the Benjarayang, which is two arms, two legs, and one body. To be in the suitable and right condition
– permits all muscles to be extended simultaneously. In a condition of weightlessness
– animates the sensory system, sweat organs, and blood flow for better
– builds the adaptability of ligaments, bones, muscles, and all joints
– changes the spine from scoliosis
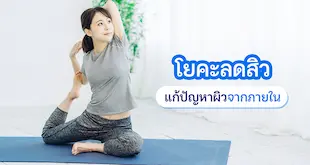
3. Twisting pose ( Ardha matsyendrasana (Ardha matsyendrasana)

Method of training
– Preparatory position: Sit with your left foot outstretched, the sole of the foot planted, the right foot placed astride the left knee, the back straight
– Inhale, raise the left arm above the head
– Exhale, the left arm intersects the right knee. Then go around and grab the outside soles of your feet. (If you can’t reach it, use your left hand. Hug your right knee close to your chest)
– Inhale, lift your right arm in front of you
– Exhale, twist your body to the right. Place your right hand behind your back, twist your waist heavily, back straight, eyes looking over your shoulder. Mindfulness of breathing in deeply, exhaling long, relaxing, remaining in the position for a moment
– inhale, draw the right arm back in front
– exhale, lower the arm, then switch sides, repeat 1 – 6 times
. Benefits
– Helps the spine to twist. make the nervous system The spine is loosened
– reduces injuries to the lumbar, hip, and back muscles
– treats connective tissue injuries
– stimulates the digestive system, absorption, and metabolism
– prevents hunchback symptoms due to bone subsidence and inappropriate posture
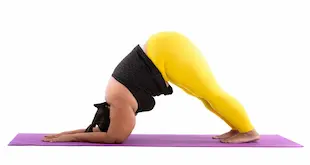
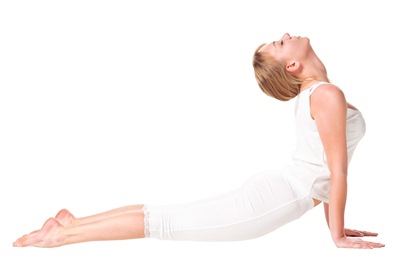
4. Downward dog pose (Adho Mukha Asana)

Step by step instructions to prepare
– Begin in slithering position. Legs and knees spread hip-width separated. Arms shoulder-width separated, fingers spread wide
– hands drive over the floor, knees raised until legs are straight. (On the off chance that your legs feel too close Curve your knees marginally for solace)
– Step your arms forward somewhat. Also, step your legs back marginally. Fix your thighs
. – Push your thighs towards your back. On the off chance that your heels lift, attempt to press your heels to the floor.
– Loosen up your head and neck and let your shoulders roll back
. – Take a full breath and hold for something like 1 moment.
Benefits
– Helps stretch your spine and knees. Back, back of thighs, calves, back of shoulders and back of arms.
5. Standing forward bend (Uttanasana)

Method of training
– Stand in mountain pose, feet may be close together. or separated as shoulder-width apart
– while exhaling, bend down. Using the pivot point at the hip joint, fingertips, or palm touching the floor in front of the toes. Or you may place your palms on the backs of your feet.
– When breathing in, bend your head as much as possible. When exhaling, release the pose slightly
– maybe hold this position for 30 seconds to 1 minute
– when releasing the pose, be careful about your back muscles. How to raise your hands off the floor Place your hands on your hips first and squat down. Inhale as you stand up.
Benefits
– Reduces symptoms of stress and depression.
– Stimulates the abdominal organs
. – Flexes the thigh muscles and makes them strong
. – Improves the digestive system
. – Reduces symptoms. Headache and insomnia
6. Warrior pose (virabhadrasana)
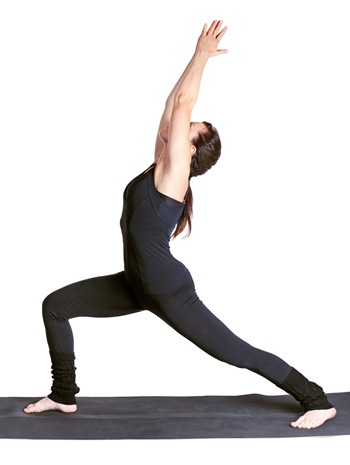
The most effective method to rehearse
– Stand straight, toes near one another, body straight, breathe in tenderly and gradually, then stage one leg back genuinely wide. with the two arms raised over the head Attempt to keep your arms near your ears to keep them straight. The chest will lift and you will feel endlessly tense in the chest region.
– Twist your right knee and contort your abandoned foot you to marginally shift forward alongside your right foot. (It will be skewed forward around 45 degrees.) Shift your weight to the front of your body. Yet, the chest area stays upstanding. Breathe out leisurely and long
– ensure your right knee is bowed before your toes. or on the other hand knees bowed at an intense point Since it can hurt the knee, hence the right leg ought to just be twisted at a right or unfeeling point. Whenever done accurately, you will feel a snugness in your right thigh. make legs firm And the abandoned leg should be straight. The left heel ought to be immovably established on the ground and not lifted.
– While getting back to the beginning position, fix the right knee. Draw the two arms down the sides of your body. Lift the left foot back to its unique position
– rehash by rotating the other leg.
Benefits
– Extends the ligaments toward the back, shoulder until arriving at the lower leg. Alleviate back, shoulder, neck, abdomen, knee, calf and lower leg torment. Counting diminishing fat around the hips, permitting further relaxing
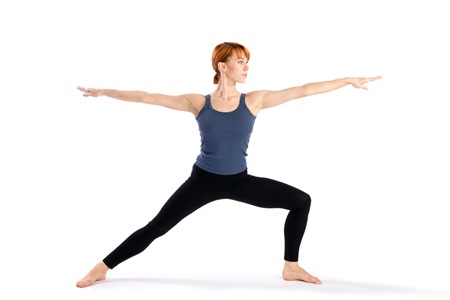
Method of training
– Stand in mountain pose, exhale slowly, jump with feet 3-4 feet wide apart, arms spread parallel to the floor
– Turn left foot 90 degrees to the left, right foot slightly diagonally to the left
– Bend left knee down until The left hip is at the level of the left knee. Left knee and left heel are aligned vertically. Right leg is tight
– both arms extended. left arm to the left right arm to right Both arms are parallel to the floor, facing to the left, looking at fingertips
– Stretch your waist, body and arms to the left as much as possible
– Hold for 30 seconds – 1 minute, relax the position
– switch sides, do the same pose.
Benefits
– Makes the thigh muscles Strong calves, ankles, back
– stimulates abdominal organs
– reduces back pain
7. Trikon Triangle Pose (Trikon Asana : Trikon asana)
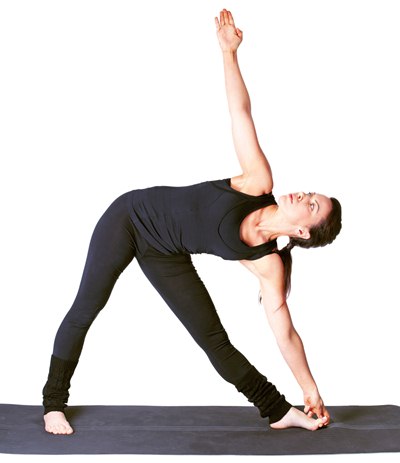
The most effective method to rehearse
– Stand upright, hands together in love.
– Breathe in, gradually step your right foot back. Open the toes outward at a point of around 90 degrees, around 1 meter away from the left foot, with the underside of the left foot in the focal point of the right foot. Knees marginally bowed The chest area is focused with knees to toes in an equal line. Fold the stomach, hips into the center of the body, hips equal.
– Breathe out, stretch your hands lined up with your shoulders. Twist your elbows marginally. The right hand is put on the floor lined up with the underside of the left foot. Twist your elbows marginally. The left hand is stretched out lined up with the shoulder. Follow the tip of your left finger. Or on the other hand stretch your hands lined up with your body, near your ears. Attempt to open your chest, shoulder, left arm, look upwards, loosen up your neck, attempt to put more weight on the bottoms of the two feet than on the center of your right hand. Then stand firm on the footing for 3-5 breaths.
– Return to the beginning situation in a straight standing position and switch sides.
Benefits
– Extends the muscles in the thighs, calves, knees, lower legs, shoulders, back
– Animates the stomach organs
– Decreases side effects of pressure
– Helps the framework Assimilation
– diminishes side effects of menopause
8. Tree pose (Vrksasana: vrks asana)
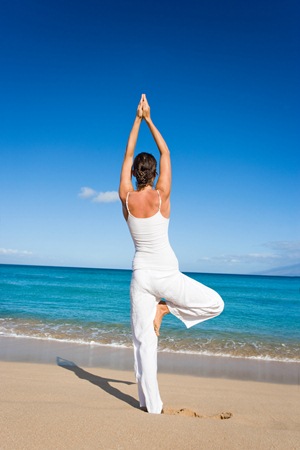
Method of training
– Stand up straight with both hands together in worship.
– Lift your right leg up, using the sole of your foot to touch the left thigh. The sole of the right foot is parallel to the inside of the left thigh. Right foot points down, knees open, hips open
– left foot supports body weight. Knees slightly bent, stomach tucked in, hips tucked in, chest open, shoulders exposed, body straight, hands clasped together, body straight
– stretch your hands above your head, parallel to your body, or you can put your hands together. Then hold the pose for 3-5 breaths.
Benefits
– Stretches and strengthens the muscles in the thighs, calves, ankles and spine
– Helps with better balance
– Reduces back pain and flat feet
– Reduces stress
– Helps the digestive system
– Reduces Menopausal symptoms
9. Bow pose (Dhanurasana)
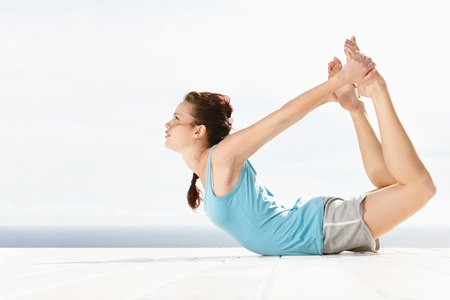
Strategy for preparing
– Lie on your stomach, feet somewhat separated, face down, brow contacting the floor
– Twist your knees, let your left hand hold your left lower leg. Right hand gets the right lower leg
– breathe in and lift the body and head up while utilizing the hand to pull the lower leg. To take the knees and thighs off the floor
– in the wake of raising the legs to the most extreme. Press your knees and toes together however much as could be expected. Stand firm on this foothold for 30 seconds
– relax the posture
Benefits
– Assists with being adaptable and reinforce the back muscles
– Invigorates the stomach organs
10. Corpse Pose (Corpse Pose )
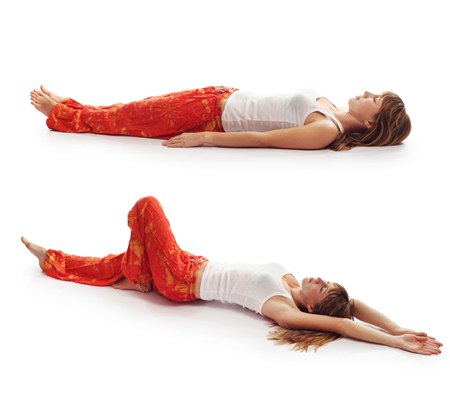
Method of training
– Lie flat on your back, stretch your legs, extend your arms beside your body. Hands slightly away from hips, palms facing up
– close eyes, bring the mind to the in-and-out breath. Just one thing
– practice deep and long breathing, adjust your in-and-out breaths to be even, not jerking
– relax different parts of the body and mind
– if your mind wanders thinking about various things, when you become conscious, pull your mind back. Then let go of that thought. Then pull the mind back to breathing in and out again.
Benefits
– Makes the mind calm. Helps reduce tension
– relax muscles
– reduce headaches Body aches and insomnia
– Helps reduce blood pressure
11.Child’s pose (garbh asana)
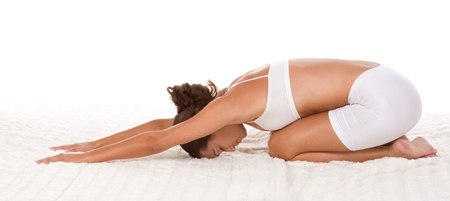
Preparing strategy
– Bow with feet near one another. Or on the other hand separate your feet somewhat. Stretch your legs and lower legs back. Plunk down behind you
– while breathing out, twist around. Put your brow on the floor. The neck is straight, not shifted aside or the other. rump on heels (In the event that you can’t twist, lift your butt somewhat.)
– Stretch the two arms over your head. Run your fingers to the furthest extent that you would be able. Then press the two palms near the floor or Then, at that point, take in and out for around 3-5 breaths.
– Loosen up the posture.
Benefits
– Helps in loosening up the muscles of the hips, thighs, and lower legs
. – Decreases back torment and neck torment.
12. Cobra Posture (Bhujangasana)
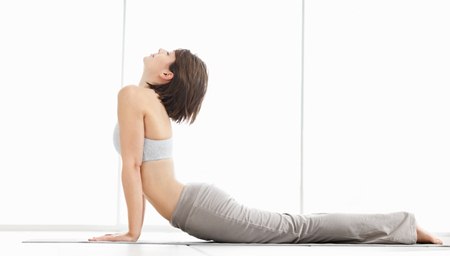
Strategy for preparing
– Lie on your stomach, twist your elbows, upper arms and hands, place them near the side of your body, legs near one another, or you can spread your legs about shoulder width separated.
– Lift your chest area, open your chest, open your shoulders. Attempt to keep your head lined up with your body. top
– stretch your arms up Yet attempt to keep your elbows somewhat adapted to lift your chest area. Attempt to extend your head up with the goal that it is lined up with your chest area. Stand firm on the situation and take in and out for around 3-5 breaths.
– Return to the
inclined position. Benefits
– Fabricates adaptability in the spine
– Works on the stomach related framework
– Excretory framework Work better
13. Half shoulder stand (sawang asana: ardha savangasana)
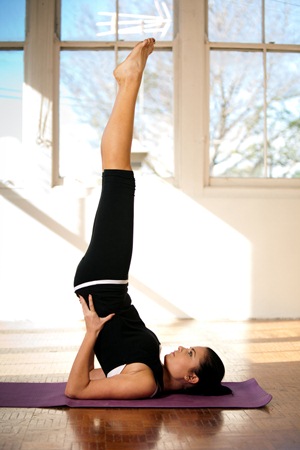
How to practice
– Lift your knees up so that your heels are on the floor next to your buttocks. Exhale. Use both arms and hands to press on the floor. Lift your hips and pull your knees toward your head in a bent-knee position. Keep the soles of your feet from touching the floor and thighs close to your body.
– Inhale slowly while exhaling, lifting your buttocks off the floor. Then lift your back off the floor until both knees are in front of your face. Use both hands to support your back until it is perpendicular to the floor. Then slowly move your hands down to push your back.
– Inhale slowly. As you exhale, stretch your knees and lift your toes pointing at the ceiling.
– Push your body up until your chest is close to your chin
– Maintain this position for 30 seconds
. – Return to you. Lie on your back.
Benefits
– Helps reduce belly fat.
– Helps tighten the muscles in the back
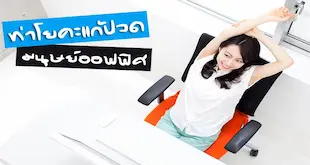
. 14. Padasana push-up pose
Strategy for preparing
– Lie on your stomach, place your hands close to your ribcage in a palm-push-up position, elbows bowed, feet near one another. Keep your fingertips on the floor
– breathe in, stretch your elbows tight. The body is straight, the neck is fixed, the neck, shoulders, hips, and feet are in a similar line.
– Stand firm on this footing for 30 seconds – 1 moment, then unwind.
Benefits
– Expands the strength of the arms, wrists, and back muscles.
– Expands the strength of the facial muscles. Stomach
1. Cat pose (Marjariasana)
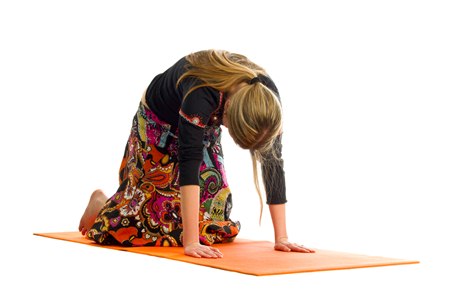
Method of training
– Kneel, both knees shoulder width apart
– Hands shoulder distance apart, arms straight
– Lift your head up, bend your waist as much as possible, maintain the position
– Bend your head down until your chin is close to your chest. Along with arching the back as much as possible
– relaxes the posture
Benefits
– increases flexibility in the spine
– reduces shoulder stiffness
– stimulates the abdominal organs